Time Machine
 3 Facebook x.com Reddit
Time Machine is Apple's backup system that automatically saves your Mac's files. Here's how to use macOS File Protection.
Time Machine is an app that Apple ships with macOS that helps you back up your Mac to another storage device. This once worked best with a now-discontinued Apple Network Attached Storage (NAS) device called the Time Capsule.
Time Capsules were introduced by Apple in 2008 and discontinued in 2018. They combined an Apple AirPort Wi-Fi network router and a hard drive for data storage.
However, the basic technology is still in use.
How to use Time Car — basics
Time Capsules were originally designed to act as an automatic backup destination for your Mac, so you could run automatic backups at regular intervals and then retrieve backups from network devices.
Time Capsules also provided snapshots of your Mac at specific intervals, allowing users to go back and access anything on your Mac at a specific point in time.
Time Machine app for macOS.
But later Apple made it possible to use Time Machine as a general purpose or time-based backup app in any supported network or local storage, and provided that the target volume supports storage in one of the required Time Machine disk volume formats.
Even after Apple discontinued Time Capsules, the company continued to ship Time Machine with macOS. All so that users could use it both for backup and to continue supporting users who still had working Time Capsules.
In the previous article, we told you how to purchase and repair a 5th generation Apple Time Capsule. We've also covered how to use Time Capsules on a modern wireless and wired network using Apple's AirPort Utility app, also included in macOS.
You can also download Time Capsule user manuals for Time Capsule 3rd, 4th, and 5th generation from the Apple Support site.
AirPort Time Capsule 5th generation.
You can use the macOS AirPort utility to install and configure Time Capsule on your network, but you are using Time Machine for backup and recovery.
Apple also released a version of AirPort Utility for Windows 7, but it has since been discontinued.
Apple continues to develop and support AirPort Utility and Time Machine in modern versions of macOS.
Apple AirPort utility.
Apple has released five versions of Time Capsules in total, the first four of which have a flat, square form factor, and the fifth and final generation with a smaller tower. All generations had one status indicator on the front of the device, and network and power ports on the back.
Most time capsules were based on AirPort and AirPort Extreme base stations with some modifications. The final model included two possible internal storage capacities: 2 TB or 3 TB.
You can also connect your Time Capsule's internal hard drive volumes to your Mac desktop using the Go->Connect to Server menu item in the Finder menu bar at the top of the screen. display.
Work Time Capsule devices are still available on the used market, including eBay, Amazon and other online sites. In most cases, you can find the original model for around $75 or less.
On macOS, there are three areas for accessing Time Machine:
- Use Time Machine settings in the System Preferences app.
- Use the Time Machine app to the /Applications folder
- Use Time Machine features in the macOS menu bar
Before you can use Time Machine to automatically back up, you must first empty your Time Capsule's internal hard drive and add it as a backup drive in the macOS System Preferences app.
We covered how to erase your Time Capsule's internal hard drive in a previous recovery article, so read that article to set up your Time Capsule's internal hard drive if you're using one.
There is also a macOS page on what disk formats to use for your Time Capsule drive.
On modern networks, in most cases you will need to configure your Time Capsule for use with Server Message Blocking (SMB). This is because SMB is a Microsoft standard that allows you to access your Time Capsule from Windows computers.
Current versions of Time Machine may not work with older versions of SMB, so you will need to check the SMB version of your server.
SMB was originally developed by IBM for the now defunct OS/2 operating system, but was later adapted by Microsoft and 3Com for use on Windows. 3Com also originally developed Ethernet.
Another alternative to Time Capsule networking is Apple Filing Protocol (AFP), an older Apple networking protocol introduced in the late 1990s and Mac OS 9. Use AFP if you are using a network that must support older versions of macOS (Mac OS X) from the early to mid-2000s – or if your network or server does not support SMB.
As noted on the macOS page, you cannot use Time Machine to back up to drives formatted using Microsoft Windows-specific volume formats such as NTFS, FAT32, FAT16, or exFAT.
For modern local backup disks, you should use the Apple APFS volume format. You can use the older HFS+ format, but some of Time Machine's new features, such as compression and optimization, may not work with HFS+.
If you try to use a volume formatted with any other file system for a Time Machine backup, Time Machine will prompt you to erase it first.
AFPS has built-in volume snapshot functionality, and Time Machine uses snapshots to store incremental backups. Time Machine also uses a file system concept called sparse images, which allows for faster and more efficient access to files on a volume.
You can also use an external drive connected to an older version of Apple AirPort Extreme 802.11ac, as long as the AirPort device is on the same network and the external drive is formatted with the correct volume format.
After formatting your hard drive and resetting your Time Capsule, you can check its status, set a name and password, and make sure it's working properly by using AirPort Utility, located on your Mac's startup drive in the /Applications/Utilities/AirPort Utility folder:
Installation is complete.
Apple also has a page in the macOS User Guide on how to reset your Time Capsule using AirPort Utility.
Once your Time Capsule's drive is set up, refer to our previous article on how to mount its volume on your Mac's desktop and add its drive as a backup drive in Time Machine's settings.
To do this, select System Preferences from the Apple menu in the macOS menu bar in the top left corner of your Mac screen. After opening System Preferences, selectGeneral-> Time Machinefrom the list on the left side of the window.
Once you've added your Time Capsule drive as a backup drive in System Preferences, you can close the Settings app and open the Time Machine app in the /Applications folder by double-clicking it in Finder.
Select Time Machine from the General tab.
How to use Time Machine for backup
If you open the Time Machine app without first adding a backup drive, you will be prompted to add one. If you agree, Time Machine will return you to the Time Machine settings page in System Preferences, where you can add the drive.
Once you add a drive to Time Machine, it will automatically create an hourly backup of the last twenty-four hours, a daily backup of the last month, and a weekly backup of everything older than that.
When a Time Machine backup starts, it runs in the background to create backups.
You may need to carefully select the backup disk because if you use the default full disk setting, the backup target volume may quickly fill up.
Soon we will talk about how to exclude files and folders from a backup.
How to use the inline icon Time Machine menu
Time Machine offers an icon in the macOS menu bar that you can use to start and stop backups and control other features.
To enable the icon, open System Settings->Control Center and scroll down to Time Machine. Click the pop-up menu next to Time Machine and set it to Show in menu bar:
Show Time Machine on system Settings.
The Time Machine icon will appear in the macOS menu bar as a small clock icon with arrows around it in the top right corner of your Mac screen.
Clicking the Time Machine iconin the menu bar, you can monitor any backups in progress, skip the current backup, view existing backups, or reopen the Time Machine preferences panel.
One of the items (usually “Backup Now” in the menu) allows you to turn synchronized backup on and off, which is very convenient. It also shows how far away the current automatic backup is from completion.
You can also skip the current backup by selecting the Skip this backup menu item.
After a time-based backup is completed, the top menu item displays the date and time of the last backup.
Apple has guidance on adding and setting up a Time Machine backup, including automating backups and using the Time Machine icon in the menu bar.
When you run a Time Machine backup, it first creates a full backup of all of your Mac's connected drives to the target volume of the backup drive. Unless you specifically exclude files or folders, everything is copied.
After the initial backup is created, Time Machine creates an incremental backup at regular intervals on the target backup drive, with each backup in a new folder.
Unlike other synchronized backup utilities such as rsync, Time Machine uses Apple file system events to note which files and folders have changed since the last backup, rather than checking the modification dates of each individual file .
By using Apple's file system events to track changes to files and folders, Time Machine can speed up backups.
How to use Time Machine local snapshots
If your backup drives are disconnected from your Mac or are offline for any reason, Time Machine will create local backups of the snapshots instead, copying them to your backup drives when you reconnect.
Because of this, local snapshots can quickly fill up your Mac's internal drive within a few days if you don't pause them. But if you pause Time Machine to avoid taking local snapshots, you won't have backups for that period of time.
So it's a trade-off between internal disk space and the amount of data you want to have in local snapshots while your backup drives are unavailable.
If you really need to do synchronized backups while traveling, consider using a small USB drive as a backup drive and plug it in periodically so Time Machine can back up to it.
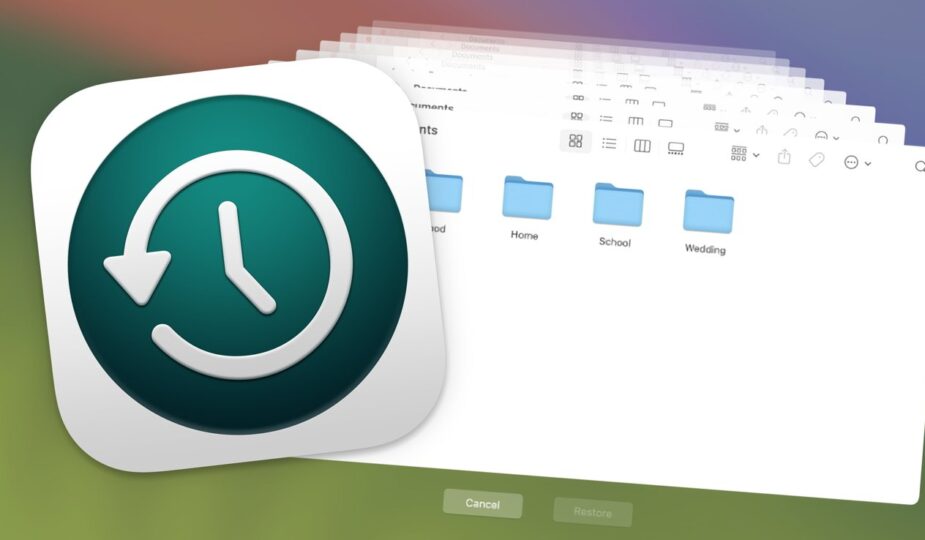
How to view backups in Time Machine
MacOS Finder lets you mount a Time Machine backup as a volume on your Mac's desktop and search it for old files—and you may want to do this in certain circumstances, but it's easier to use Time Machine's built-in browsing interface backup sets on the target backup disk.
Time Machine provides a user interface called “windows from the past,” as Apple calls them—a set of windows on the backup drive that you can swipe through to view the incremental backup at any given time.
By swiping through grouped windows, you can view backups at any point in time and retrieve files just as you would in regular Finder windows.
This tunnel effect is very powerful and easy to use as you can easily scroll through synced shots.
View Time Machine snapshots.
To open the Time Machine viewer from the menu bar, click the Time Machine icon, then select menu item View Time Machine backups.
When you view synced backups, a timeline appears in the bottom right corner of the tunnel, showing where you are in the timeline. There are also up and downarrow buttons that you can use to scroll through the windows.
The Restore button allows you to restore the current photo you are viewing.
How to back up a local drive using Time Machine
Using a local drive for backup is essentially the same as using a network backup drive.
To use a local drive as a backup target, make sure it's connected to the Finder desktop, then go to the System Preferences app and add it as a backup drive, just like you did for a network or Time Capsule drive.
Time Machine will begin copying backups to your local drive at regular intervals.
The obvious advantages of backing up to local disks are performance and portability.
How to exclude files and folders from Time Machine backups
Time Machine allows you to set which files and folders to back up and which to exclude. By default, everything is backed up.
To exclude specific files or folders from backups, see Apple's Exclude Files from a Time Machine Backup on Mac page.
To do this, you need to go back to Time Machine settings in the System Preferences app, click Options, and then click the + button to exclude files and folders from backups.
You can also use the +and – buttons to exclude entire external drive volumes from backup.
How to restore from Time Machine backup
For information about how to restore a Time Machine backup, see Apple documentation.
Basically, to restore items from a Time Machine backup, you first open the containing folder on your Mac in Finder, then launch Time Machine, navigate to the snapshot you want to restore from, select the items in Time Machine and finally click the Restore button.
When you restore items from a Time Machine window, they are restored to the same location on your Mac's desktop, in the same folder they were backed up from.
Be careful when restoring, however, as the restored item may replace any existing version, so you may want to manually back up the same items from your Mac first, or move them aside to make room for the restored versions.
How to restore from a Time Machine backup during installation
macOS also includes an app called Migration Assistant that you can run to restore content from one Mac to another. The macOS Installer also gives you the option when you first install macOS to use a Time Machine backup as a recovery image for your installation.
If you select the “Use Migration Assistant” installation option in the macOS installer, you can select the option to allow Migration Assistant to use an existing Time Machine backup as a source.
How to control the Time Machine from the command line
There are several commands in the macOS Terminal that you can use to control Time Machine, but the main one is tmutil.
For information on how to use tmutil, in the Terminal, type:
man tmutil and press Return.
tmutil is quite detailed and contains many detailed controls for managing Time Machine and disk backups.
One important use of tmutil is to disable local snapshots if your backup drive is unavailable.
To do this in the Terminal, type:
sudo tmutil Disablelocal and press Return.
To re-enable local snapshots, type:
sudo tmutil Enablelocal and press Return.
Because Time Machine continues to run even if the backup drive is disconnected (unless you pause it), your Mac's internal drive can fill up with local snapshots pretty quickly.
Another tmutil command is tmutil listbackups. Using this command, you can view all completed backups and their full disk file system paths.
How to find Time Machine documentation
Apple has several pages online dedicated to using Time Machine, but there is no separate user guide – the main Time Machine guide is in the macOS User Guide and is called “Back up files with Time Machine on Mac.”
There are also pages on how to start, pause, and resume backups, how to restore, how to back up to a shared folder, and how to exclude files and folders from a Time Machine backup.
There is a quick summary page called “Back up your Mac with Time Machine” that provides a variety of quick information and links to more detailed documentation.
The macOS User Guide also has a page on using Time Machine settings.
You will want to read all the pages to fully understand how Time Machine works.
Although Time Machine was originally intended for the Apple AirPort Time Capsule, it is still relevant today and is a quick and easy way to back up and restore data from your Mac without much effort.
/p> Follow AppleInsider on Google News.