New iPhone 16 Pro Cameras
 5 Facebook x.com Reddit
Apple's latest iPhones come with impressive hardware and software for taking photos and videos anywhere. Here's how you can make the most of it by mastering the Camera app on your iPhone 16 Pro and iPhone 16 Pro Max.
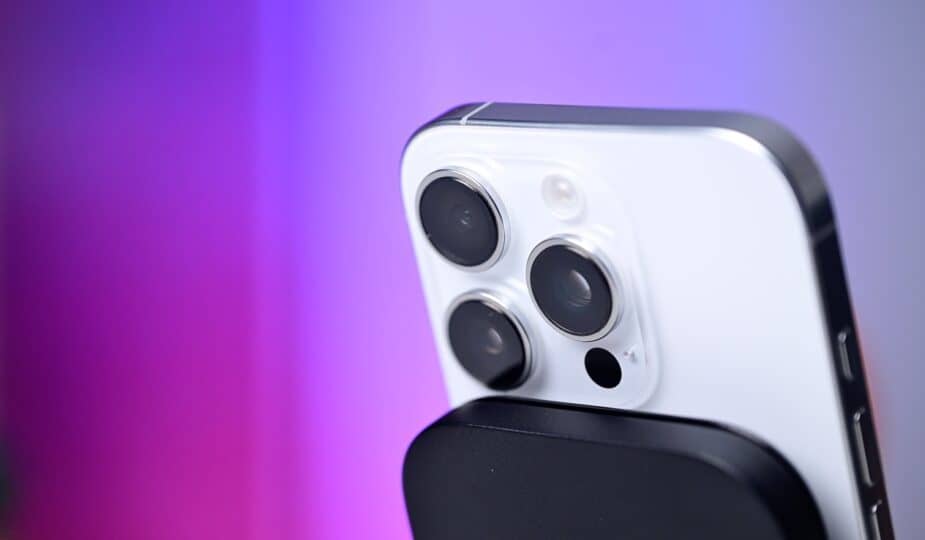
In 2024, the cameras on both pro phones have feature parity. They have identical setups, unlike the iPhone 15 Pro, which lacked the 5x zoom that the iPhone 15 Pro Max had.
There's a 48-megapixel ultra-wide lens, a 48-megapixel main lens, and a 12-megapixel 5x telephoto lens. It's easier than ever to choose a third-party app, but if you're sticking with the stock app, here's how to master it.
Subscribe to AppleInsider on YouTubeSubscribe to AppleInsider on YouTube
Opening the Camera App
It's easy to just open the camera without setting it up and relying on the default settings. But there are so many options now that it's still worth considering.
Of course, you can tap on the Camera app icon wherever you choose to place it on your home screen. If you long press the icon, you will have additional options to switch to different modes of the camera app.
In addition, you have several options on the lock screen. You can swipe left to quickly access the camera app or place a shortcut widget at the bottom of the screen or under the time in any bottom corner.
The dedicated camera control can also launch an app. Just note that it requires two taps on the lock screen. One tap wakes the phone, and the second tap launches the app.
The action button can be set to open the Camera app
Camera is one of several options that can be assigned to the action button. Finally, the camera control can be added to the updated Control Center.
Choose one or more of these, depending on your personal preferences and use cases.
Taking photos and videos
Sticking to simple tasks, you can take a photo by tapping the shutter button in an app. This is the easiest way.
If you press and hold the shutter button, you activate something called QuickTake. QuickTake will start recording video with that long press.
So long press for photos, long press for videos. The video stops when you lift your finger, unless you drag your finger to the right.
By dragging the shutter to the right, you can lock it in video mode with QuickTake
Dragging your finger to the right locks it in video mode. At any time, to stop recording, tap the square that replaces the shutter button.
QuickTake can also take burst photos. Tap and immediately drag to the left, and you will start recording a burst of images until you release the button.
Another popular way to take photos or videos is to use the volume buttons. Press either of them in the camera app to take a photo.
The volume buttons can be used to take photos
Like QuickTake, holding down one of the buttons will start recording a video. In the Settings app, you can set the Volume Up button to start burst mode, which we recommend.
The last real way to take a photo or shoot a video is with the new dedicated camera control. It’s exclusive to the iPhone 16 series and does a lot more than just the hardware shutter button.
Camera Controls
To reiterate, the camera control can be used to quickly open the Camera app as well as take a photo. A quick press will take a photo, but holding it will record a video.
Camera controls on the iPhone 16 series
This physical button is unique. While there’s still a real mechanical mechanism underneath it, it’s also a virtual button.
The top is touch- and pressure-sensitive. Pressing it halfway reveals a toolbar with several camera functions that you can adjust from Portrait mode to exposure.
A light press brings up additional controls.
We have a whole guide dedicated to this button that we recommend checking out if you want to learn the ins and outs and what settings you need to change.
Camera app layout
Apple’s default Camera app is laid out simply. Swipe left or right to change the mode, which defaults to Photo.
At the bottom is a prominent shutter button, giving way to a recent gallery and camera switcher. Above are the various camera modes and zoom levels.
There are a few controls at the top of the Camera app to toggle
At the top are a few different controls. These controls change based on a few factors, including mode, lighting, and your personal settings.
Some of the default controls, from left to right, are Flash, Shared Library toggle, Exposure Compensation, Live Photo toggle, and Photo Styles.
Flash is an on/off toggle, but long-pressing it gives you the additional choice of Auto mode. Shared Library lets you control whether a photo is stored in your personal or shared library.
Live Photos are similar to Flash in that you can long-press it to set it to Auto, On, or Off. Photo Styles have been updated, and we’ll talk more about them soon.
In the center of the top controls is an icon that looks like an upward-facing caret. Tap it, and a new toolbar will appear at the bottom of the app above the modes.
The hidden shelf at the bottom reveals more controls.
Some of these duplicate the top bar, while others are new. Some just give you more options.
You have flash (auto, on, off), night mode (on, off, duration), Live Photo toggle, photo styles, aspect ratio (4:3, square, 16:9), exposure compensation, timer (off, 3s, 5s, 10s), and shared library.
Two more controls worth paying attention to. The night mode icon that appears in the toolbar will also appear in the top bar if the lighting is too dim.
If there isn’t enough light, what you’re essentially doing is increasing the shutter time. This allows more light to hit the sensor and expose the image correctly.
When it’s on, the icon will turn yellow. If it’s gray, it’s off.
If you access it from the bottom toolbar, you can manually adjust the duration from 1 second to 30 seconds. The available time will automatically adjust depending on the lighting and the stability of your phone.
When you're shooting handheld and moving, the long shutter speed of 30 seconds won't work and will need to be made shorter. But if your phone is steady or mounted on a tripod, up to 30 seconds will be available.
When your subject gets closer, macro mode turns on
Macro mode works similarly. It only turns on when it detects your subject is getting closer to the camera.
By default, macro mode turns on and off automatically. If you turn on the toggle in the camera settings, you can manually control this.
A flower icon will appear in the corner. Tap it to turn it on and it will turn yellow, and tap it again to turn it off and it will turn grey again.
Controlling the zoom
When it’s time to go through all the controls and actually take a photo, you may need to adjust the zoom level. Zoom in or out to properly compose your photo.
You can do this by pinching or unclenching your fingers on the display. It’s quick, but it often creates some movement, making this method unsuitable for shooting video.
There’s also an alternative called Capture Control. It’s a little smoother and lets you fine-tune the zoom by swiping your finger.
On the screen, you have the options of .5X (ultra-wide), 1X (wide), 2X (optical zoom), or 5X (tele). Pressing the 1X button gives you the bonus choice of 28mm 1.2x zoom or 35mm 1.5x zoom for the 24mm 1X.
If you prefer 28mm or 35mm, you can choose which one to use by default in the Settings app.
Swiping across the zoom levels opens the adjustment wheel
For now, we prefer to open the zoom wheel. Just swipe across any of the zoom options.
A wheel appears, allowing you to continue sliding left and right to zoom in and out in detail. When you're done, release to let the wheel close automatically, or swipe it away.
Photographic Styles
Apple has released a completely redesigned tool for the iPhone 16 series. These next-generation Photographic Styles are much more powerful and there are more of them.
New Photographic Styles offer granular control over your look
When you apply a filter to your photo, it applies that look to the entire image. Photographic Styles are different because they are applied to different elements of the photo when you take the photo.
For example, applying different adjustments to shadows, highlights, the subject, and more. However, the iPhone 16 series captures this additional data, allowing you to customize the styles after you take the shot.
Here are eight different photo style colors
Whether you change them before or after, the interface is the same. You can swipe left and right to move between styles, or adjust them by sliding them along the two-way bar.
Up and down on the bar adjusts the tone, while left and right adjust the color. You can see the values at the top, and there is also a reset button to return to the default values.
Photo Modes
On the iPhone 16 Pro and iPhone 16 Pro Max, in addition to the main photo mode, you also have Portrait, Spatial, and Panorama modes.
Panorama creates panoramic images, great for landscapes and nature. You press the shutter button and move the phone, capturing the entire image.
When taking handheld panoramic photos, we recommend holding your hand still and rotating it from your hips. This creates a steadier image.
Another helpful tip: you can change the orientation. By tapping the arrow, you can change the direction of movement from left to right or right to left.
Spatial mode builds on the previous Spatial video shooting on iPhone 15 Pro and iPhone 15 Pro Max. Spatial mode now captures both photos and videos.
Photos can capture both motion and depth data for combined Live Photos and Portrait photos
That brings us to Portrait mode. Portrait mode adds an adjustable amount of background bokeh to your photos of people, pets, and even objects.
Previously, you had to choose between Portrait photos and Live Photos. Not anymore.
When you take a photo in photo mode and it detects a person or animal, it also collects depth data. You can then choose whether you want it to be a Live Photo or a Portrait Photo.
The only limitation here is that it takes a second to detect the subject. You’ll know it’s capturing depth data by the stylized “f” that appears in the bottom left corner.
Video Modes
Video modes include standard video, time-lapse, cinematic, and slow motion. They all bring something a little different to your movies.
Time-lapse records frames over time and speeds them up by varying amounts depending on their duration. Slow motion records at a high frame rate, up to 240 fps at 1080p or 120 fps at 4K.
Cinematic mode is essentially Portrait mode, but for video. It focuses on the subject and blurs the background.
Audio mix on iPhone 16
You can change the focus after shooting, bringing the subject or background objects into focus as needed. The amount of blur can also be adjusted.
While shooting a video, you can adjust the frame rate and resolution in the top right corner. Just tap on either one and they will toggle.
The last mode is a little hidden. This is the Action mode, which is enabled via an additional switch that appears in the top right corner as a running man.
When enabled, it can dramatically help stabilize footage when you are moving or shaking. However, it has two limitations.
Action mode footage can only be recorded in 2.8K and requires a suitable amount of light. You can enable low light shooting in the settings if needed.
Additional settings
Beyond using the app, there are a few settings we recommend for those who want to get the most out of the camera. You can find them under Settings > Camera.
For video, we set it to record in 4K24, but 4K30 is also fine for most apps. If you plan to edit video with other footage, perhaps from a second camera, it may be useful to also turn off HDR to avoid complications.
We also set the camera format to High Efficiency and 24MP. Pros may want to turn on RAW photos, but they take up a lot more space.
If you're not sure where to start with RAW, try HEIF Max, which shoots up to 48MP but doesn't take up as much space as ProRAW.
The level makes it easy to keep your photos straight and lights up when they're perfectly level.
Finally, we've also included a grid and level to help with framing our photos.
Follow AppleInsider on Google News