xTool P2 55W Tabletop Laser Cutter Review
 0 Facebook x.com Reddit
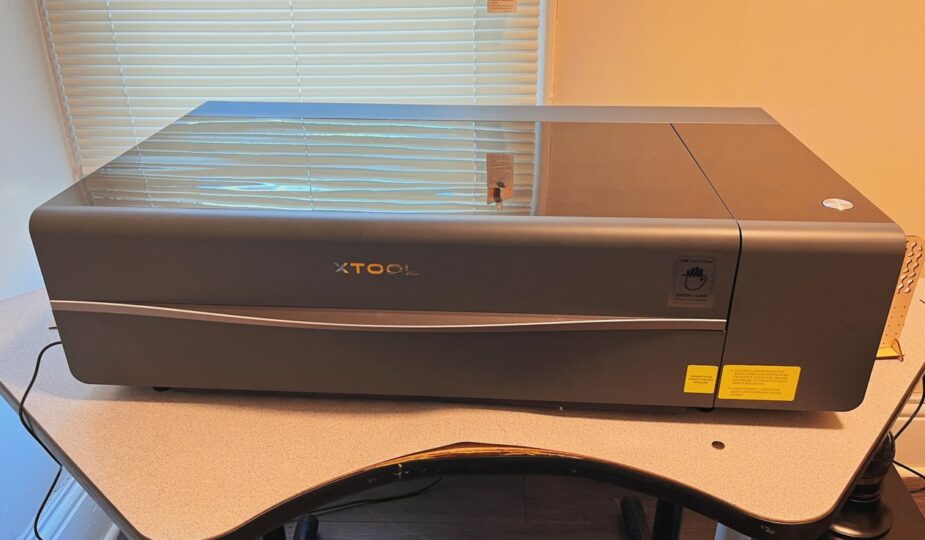
xTool P2 55W Desktop CO2 Laser Cutter
4.0/5 Buy at xTool
Use the power of light with the xTool P2 laser cutter and engraver – a powerful CO2 laser 55W, which can help you make all your DIY dreams come true.
Laser cutting is taking the manufacturing world by storm, just like 3D printing did many years ago. What was once a niche hobby for those comfortable building their own lasers piece by piece has now opened up with ready-to-use laser machines that anyone can purchase.
Although Glowforge is probably one of the most famous ready-to-use lasers, it is far from the only one.
That's why we're excited to introduce you to the P2 55W Tabletop CO2 Laser Cutter from xTool. This is a universal device that can revolutionize home laser work.
xTool P2 Desktop 55W CO2 Laser Cutter Features
Before I get into my personal experience with the P2 laser, here are a few useful features you should probably know before we get started.
| Laser type | CO2 laser tube |
| Power | 55 W |
| Weight | 99.2 lbs (45 kg) |
| Bed area | 680 x 360 mm (26.8 x 14.2 inches) |
| Work area | 600 x 308 mm (23.6″)” x 12.1″) |
| Working height | 72 mm (2.7″), up to 215 mm (8.4 inches) with optional stand |
| Connection types | USB C, Ethernet, Wi-Fi |
| Cameras | two 16 MP cameras, one wide-angle, one precision |
| Engraving accuracy | 0.01 mm |
| Engraving speed | 600 mm/s |
| Conveyor support | yes, with accessory |
| Passing support | yes |
| Rotating support | yes, with accessory |
| Emergency stop button | yes |
xTool P2 55 CO2 Desktop Laser Cutter Review W is frighteningly easy to set up
I can be a little skittish when it comes to setting up unfamiliar tools. This is doubly true for something large or inherently dangerous. The P2 only weighs about 100 pounds and is covered in a lot of stickers warning you not to set your work area on fire or shoot a laser at your eyeball — so I was a little hesitant to start.
I was immediately overwhelmed when I finally took the time to unbox the P2. However, looking back, I didn't need it. As it turns out, xTool has created a product that almost anyone can set up.
As soon as you take P2 out of the box — probably the most difficult task in the entire installation process — It only takes about 20 minutes to start the laser. This is an exceptional case, whether you're really keen or nervous, as it means you'll go through the annoying setup steps almost immediately.
Review of the xTool P2 55W desktop laser cutter – – Open the back to check the laser tube
The setup basically consists of a few quick checks to make sure your gantry and laser head move freely, make sure your laser tube isn't cracked, fill the reservoir with purified (or distilled) water and antifreeze, and connect the exhaust hose.
Access to the storage tank is achieved by unscrewing eleven screws, removing the back cover and unscrewing the tank cover. While the xTool doesn't provide you with the distilled water you need, it does provide you with antifreeze and a useful funnel.
When adding antifreeze, you should consult this handy chart to determine how much to add. This is important if you plan to place the laser in an unheated or insufficiently heated workspace, such as a garage or basement workshop.
Once the fluids are loaded into the machine, it is time to begin calibration. I expected calibration to be a real nightmare — in much the same way that calibrating a 3D printer can be difficult — but that's not true. I guess it was partly luck as my P2 didn't require much fiddling. However, calibrating a laser cutter is less complicated than calibrating a 3D printer.
To calibrate, you need to connect the device to your computer via USB. There's no way around this, which means if you're a desktop user, you'll need to temporarily move your desktop into your workspace, even if you plan to use the device wirelessly with your iPad.
Using xTool Creative Space, you simply place the laser head in the lower right corner. Then cover the hole on the laser head with masking tape. Close the laser cover, pulse once or twice — not too many times, as you can set the tape on fire — and see where your mark lands.
Review of the xTool P2 laser. Calibrating the laser involves trying not to burn a piece of masking tape.
It's OK as long as it falls within 3mm of the center of the hole. If not, then you have some hard work ahead of you. You will need to take the included screwdriver and hex key and adjust the mirror so that the laser burns a hole in the middle of the tape.
Luckily, xTool has a great video that shows you what you need to do if you go outside of this range.
Mine was barely off-center — definitely within 3 mm — , but I still tinkered with it a bit to see if I could get it even closer to the center. In total, it took me about three minutes to get the results I wanted, bringing the total installation time to — not counting breaks — to less than 20 minutes.
Review of the xTool P2 55W desktop laser cutter – xTool Creative Space
Before I get into the actual product, I want to talk about xTool Creative Space, or XCS for short. XCS is software developed by xTool for use with its calibration and project creation products.
I was amazed at how easy XCS was to use, whether I was using it on my iMac or iPad. It has a very simple interface that is intuitive to use.
xTool P2 Laser review – cut file mockup in xTool Creative Space on iPad
Because I have some experience with 3D printing, design and CAD software, I didn't feel the need to look for any tutorials. However, if you need more help, the Internet is full of tutorials on using XCS, including many from xTool.
Starting a project is as easy as taking photos of the content on your platform using the xTool camera. Then you drag the project file into it, place it on the material and check that the settings are correct. Settings are easily done on the right side panel.
After that, you just need to click “Process”, “Start” and then click the button on your xTool P2 — that's all.
You can even create projects in XCS if you want, although the tools can be a bit primitive. I've found that it's a little easier to create a design in Adobe Illustrator or a similar program, save it as an .SVG, and import it into XCS.
You are also not obliged to XCS. Like many 3D printers, xTool allows you to use other software to control your machines. A lot of people are very loyal to Lightburn, but in the interest of transparency, I never got around to using it. I found XCS to be more than sufficient for my needs.
What can you cut and engrave with the xTool P2 55W Desktop CO2 Laser Cutter
You might be wondering what you can do with xTool P2 — and that's fair. With xTool you can cut and engrave paper, wood, acrylic, leather, cardboard, MDF, felt and rubber — but this is not an exhaustive list.
During the test, I personally tried wood, paper, chipboard, cardboard and acrylic. However, a quick search online reveals that you can also cut and engrave fabric, slate, mylar, marble, tile, and glass.
xTool P2 Laser review – engraving on the front panel of a chipboard laptop
However, it is worth noting that there are several things that cannot be cut with any tool. CO2 laser, P2 or other.
Do not attempt to engrave or cut galvanized metals as they are coated with zinc. When heated, zinc releases a very toxic gas.
You won't be able to cut most plastics either. Not only do they melt rather than cut clean, but they also tend to catch fire. ABS, HDPE and polycarbonate cannot be used with laser cutters. In addition, waste PVC releases dangerous chlorine gas, which is not only dangerous to anyone who inhales it, but also causes metal corrosion, which is harmful to your car.
xTool Smoke Purifier
Laser cutting will create the smoke you'll need to deal with. The cheapest way to deal with this problem is to simply throw the exhaust hose out the window. If you have a permanent place for your machine, you can add a vent in the wall.
However, these are not the only options — You may also want to consider purchasing a dedicated air filter. The xTool company kindly provided its smoke purifier — or air filter — next to P2.
The smoke purifier is a computer tower-sized box that can be plugged into an air vent. It has a three-stage filter system that draws air from the laser through the top and out through the front.
It's incredibly simple – — There is a knob on the side that controls the suction power of the filter, a power switch on the back, and a lid that allows you to pull out and replace the filters as needed.
Setting up is also very simple. You simply attach the laser cutter vent hose to the top of the air filter, tighten the metal bracket around the hose, and you're done. You can even release the purified air through the second hose if you wish.
Review of xTool P2 Laser – smoke purifier under the laser table
The top layer of the filter is designed to capture large particles. This layer can be washed and will be the dirtiest one first.
The second layer is a HEPA honeycomb structure that xTool says filters out 99.97% of 0.03 micron particles. The third layer is an activated carbon filter. This layer is designed to absorb harmful gases and unpleasant odors.
How often you change the filter depends largely on how often you use the laser and what you're cutting. There is nothing on the filter itself to tell you when it needs to be replaced — no backlight, no small display — so you will have to rely on spot checking the top filter.
I think the smoke purifier works very well. It's loud, but not deafening, and certainly not much louder than the P2 itself. I had already decided to wear hearing protection when working with the laser—an abundance of caution never hurts—so I wasn't too concerned. However, I wouldn't run it while the kids are napping or if you plan to take an important phone call in the next room.
A smoke purifier is by no means a cheap accessory — at $800, it's a significant investment. Replacement filters are also not cheap – — Replacing all three filters costs $136.
However, if you are unable to ventilate the laser outside your workspace or want to reduce the amount of harmful radiation your laser produces, it would be a good idea to purchase one.
Review of the xTool P2 55W Desktop CO2 Laser Cutter — also frighteningly easy to use
Once I got everything set up, which again — It only took me about half an hour — I was ready to start my first project. I decided to start with something quite simple – — set of wooden stands.
I opened xTool XCS and P2 automatically sent me an image of the cutting machine. This allowed me to see exactly where to place the cut files.
I will say that since it is a wide angle lens, there is little distortion. For most projects this won't be a problem.
But if you are making cuts that require great precision — say, if you are using material from which you have already cut out shapes before — You can choose a precise shot that uses a camera attached to the laser head.
Review of the xTool P2 laser. It turns out that the laser cuts 3mm thick linden very, very quickly
One day I had a clear idea of 3mm linden. of the millimeter linden tree that I wanted to cut, all I had to do was drag the cut .SVG file onto the material, position it the way I wanted, and click a button. Then, after pressing start, I just had to press the shiny silver button on P2.
It only took a few minutes to cut the four wooden coasters from start to finish. The laser quickly coped with such a complex project — I was somewhat taken aback. As it turns out, cutting happens very, very quickly.
My next project was something I had been wanting to do for a long time. I wanted to make a little stop sign keychain. So this time I turned to Adobe Illustrator, designed a stop sign and imported it into XCS. After a quick search on how to properly engrave acrylic, I came up with a multi-step engraving and cutting project.
xTool P2 Laser review: Engraving on clear acrylic results in a neat frosted glass effect
I pressed the big silver button on the P2, and seven minutes later, I had a keychain. The freezing effect was incredible and I was amazed at the accuracy.
From there I cut and engraved a variety of things: geometric jewelry, a coffin-shaped trinket box, a wooden jewelry stand, some acrylic lanterns, and more. Each time I was impressed by the speed and accuracy of the machine.
xTool P2 55W Benchtop CO2 Laser Cutter – Though There's Still a Learning Curve
That being said, that doesn't mean I haven't had some setbacks. Looking back, the failures seemed obvious, but hindsight is 20/20, so I won't blame myself too much for that.
Initially I wanted to make a linden puzzle for my father. I started the project by engraving an AI generated image of a dog that I created in XCS. The engraving took about 45 minutes because it was so detailed.
After the engraving was completed, cutting began — and this is where I really screwed up. You see, the xTool P2 comes with a grid base that happens to be the same width as a puzzle piece.
xTool P2 laser review: mistakes were made
When the laser started cutting, parts fell through the slats onto the floor of the laser bed and were quickly ignited by the laser during repeated passes in the same area.
Yes, I started a small fire three or four projects later. However, the fire went out when I turned off the laser. So, to give it its due, the machine does a good job of not allowing a small flame to quickly get out of control. Having said that, keeping a fire extinguisher nearby is a smart idea.
I also learned that even after sanding, acrylic does not stick to itself very well with standard CA glue. As it turns out, you need a special glue that will effectively weld the acrylic to itself.
My last lesson was one I probably should have predicted. However, in anticipation of starting the living hinges project, I shrunk my book box project to fit inside a linden leaf. The problem was that I didn't realize that reducing the scale also resulted in smaller holes, which were sized to accommodate the 3mm thickness of the material.
So after I was done I found out that each hole in my project was now about 1.5mm smaller for the tabs. Although annoying, it was fixable and I had to take the rotary tools and manually widen the slots. So, not my finest moment, but certainly not enough to turn me away from laser cutting.
Review of the xTool P2 55W desktop CO2 laser cutter — a fantastic workhorse that almost anyone can use.
When I started writing this review, I was having a hard time recommending a product that costs over $4,000. This is a significant cost, especially if you have not done laser cutting before.
However, it is difficult not to recommend P2. As someone who has always wanted to use a laser cutter but had no experience, I can't say enough positive things about it.
I've only spent a few weeks on this, but my friends and family are already asking if they can pay me to shorten projects for them. I already have gifts planned for Mother's Day and Father's Day. I already have dozens of ideas for projects that I can't wait to start.
xTool P2 Laser Review – Engraved Acrylic Lamp
A quick look at Etsy shows that the average cost of a laser design file is under $5. The materials, although not very cheap, are not very expensive either. After running out of xTool's provided acrylic sheets, I replenished my supply with 40 new sheets for $31.
Ultimately, if you're looking for a laser cutter and have room for one, the xTool P2 is fantastic. This is especially true if you plan to use it to create projects that you will sell. I've seen xTool pay for itself — and its maintenance — as soon as possible.
Where to buy the xTool P2 55W CO2 Tabletop Laser Cutter
You can purchase the xTool P2 55W CO2 Tabletop Laser Cutter from the xTool website for a limited time price of $4,299. which is lower than its regular price of $4,999. It comes in Space Gray and Pearl White colors.
As an alternative, xTool sells a 55W P2 laser through Amazon, but at the time of publication it costs $100 more.
Rating: 4 out of 5
A word about ratings . It can be difficult to assign simple ratings to certain objects – — I would say this product would be closer to a 3 for the average DIYer and a 5 for someone who plans to do some or all of their laser cutting.
Ultimately, I gave it a 4 out of 5 due to its versatility and ease of use combined with its high cost and large size.
xTool P2 Laser – pros
- Quick installation time
- Closed system
- Beginner-friendly
- Dual chamber system
- 55 W laser capable of cutting thick materials
- Lots of add-ons to expand your capabilities.
xTool P2 Laser – Cons
- Expensive startup costs.
- Requires external ventilation or a special air filter for an additional $800.
- Large size may limit a place where you can place it.
- Expensive start-up costs.
- Requires external ventilation or a special air filter for an additional cost of $800.
- The large size may limit the space where you can place it.
- li>